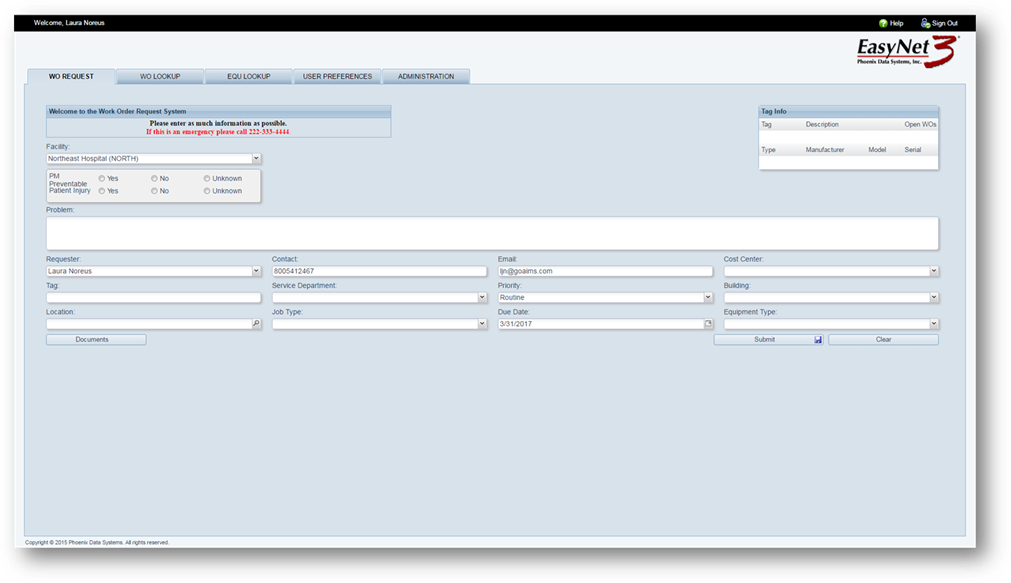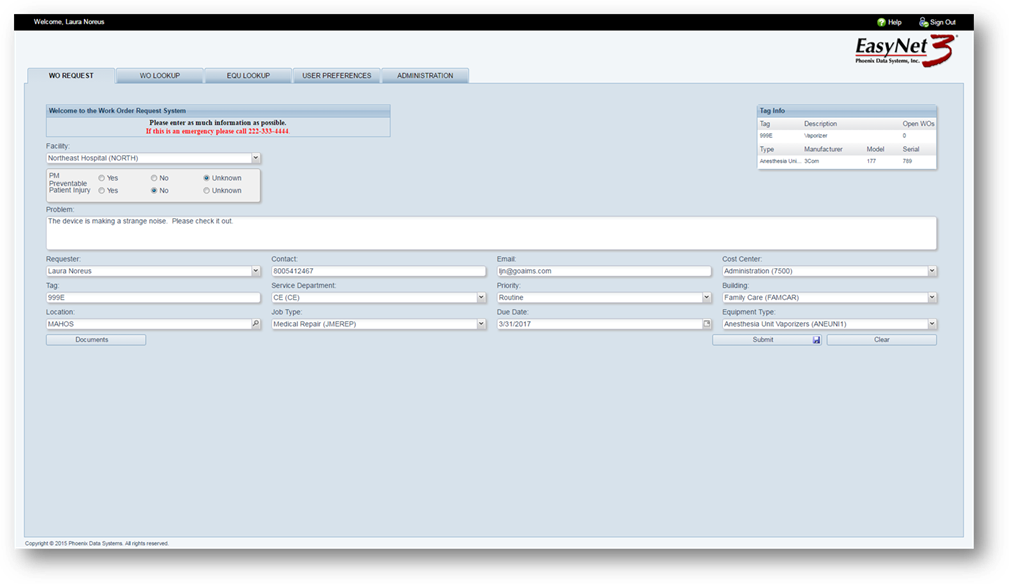
EasyNet 3 opens to the WO Request Screen displayed below.
NOTE: Your screen layout may differ from the example below. Not all fields shown may be available to you.

1. Accept the Facility default or select from the valid entry list.
2. Select Yes, No or Unknown for PM Preventable.
3. Select Yes, No or Unknown for Patient Injury.
4. Enter a description of the Problem, up to 500 characters.
5. Enter your name or employee number as the Requester. When entering an employee number, the field will populate with the associated name.
6. Enter your Contact information such as phone number, extension, etc.
7. Enter your Email Address.
8. Select a Cost Center from the valid entry list or tab through it. This field will auto populate once you enter the Tag number.
9. Enter the Tag Number. Upon tabbing off this field, the Cost Center, Service Department, Building and Location fields will auto populate from the information on the Tag.
NOTE: The Tag Number field is a multi-search field. Entering the Tag Number or Tag Description will display matching entries for selection. With System Setting “Use Serial Numbers in Tag Field Search” enabled entering the Serial Number will also display matching entries for selection.
10. Accept the Service Department default or select from the valid entry list.
11. Accept the Priority default or select from the valid entry list. This may cause the due date to change automatically.
12. Accept the Building default or select from the valid entry list.
13. Accept the Location default or enter the location.
14. Accept the Job Type default or select from the valid entry list.
15. Accept the Due Date default or enter the Expected Due Date by which the work should be completed.
16. Accept the Equipment Type default or select from the valid entry list.
17. Click the Documents button to attach a document to the work order.
18. After you have entered the appropriate values for each field, click Submit.
•To clear a Work Order Form, click Clear before it is submitted.

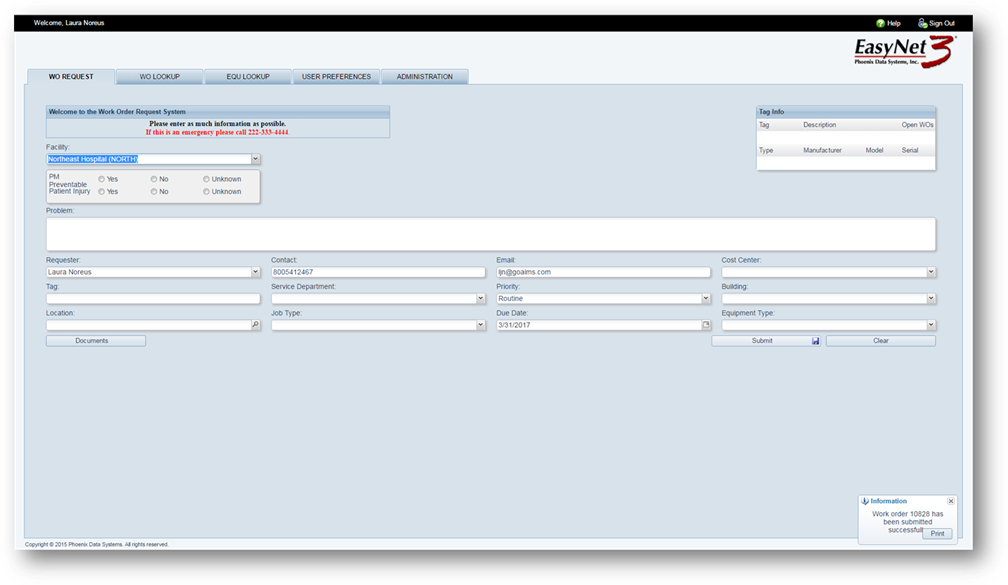
After clicking on Submit, the specific work order entries will clear from the screen and you will receive the informational popup seen in the screen shot below. This popup notifies you of your work order number and confirms that the work order was submitted. You may click on the Print button to see a copy of your submitted work order.

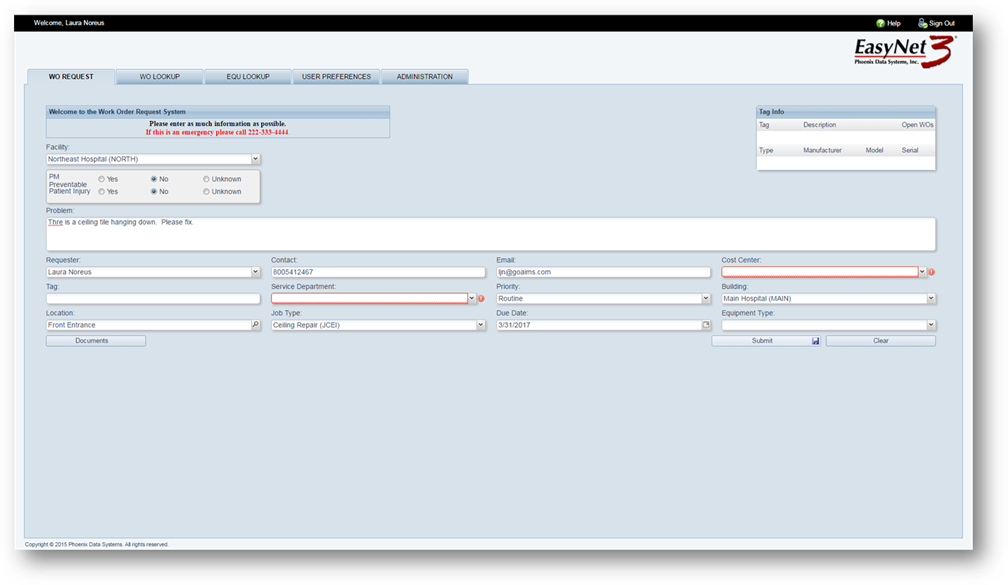
You will be unable to Submit a work order if fields have been left empty that are setup in your system as “required fields”. Upon clicking on the Submit button or when tabbing through the fields, the “required fields” will be outlined in Red with a warning that they are required.
